

Ionic is the Leading Cross-Platform development framework. Ionic let you build Mobile application for Android, iOS and Windows with just a single codebase.
The first issue that beginner's have when they want to build an Ionic App is that they don't have previous experience with the technologies behind the Ionic Stack.
Ionic 3 uses Angular, Typescript and HTML5 for it main components.
The first two stack technologies are both based on javascript.
Therefore, To truly understand this tutorial you should be able to write basic JavaScript. You are expected to understand functions, Objects, arrays and variable declarations.
 Download Script
Typescript is a superset of JavaScript, It easy and scales your JavaScript codes. Angular 5 is currently in beta, It's now faster and smaller,
Angular application production build are now minimized and work faster.
Software Requirements for Building Ionic 3 Mobile App
For our final source code, You will need Android Studio install on your machine before we can build the Android Version of our Ionic 3 mobile app.Secondly, To build the iOS version of our Ionic 3 Mobile app we will need to install Apple xCode on your MacBook.
Finally, To build the Windows Mobile version or our Ionic 3 App we will need to install Microsoft Visual Studio.
Installing NodeJs and NPM
In case you are hearing about Nodejs for the first time, NodeJs is a JavaScript runtime that uses an event-driven, non-blocking I/O model that makes it lightweight and efficient.Simply put, A JavaScript on the server side as most developers like to see it.
To build our first Ionic 3 Mobile App we need to install Nodejs.
If you don't have NodeJs installed on your machine already.
Visit NodeJs Website Download Page. to download and install NodeJs in your machine.
NPM also know as Node Package Manager is a JavaScript package manager that is hosting thousands of JavaScript reusable modules.
Firstly, If you are running on Windows PC, NodeJs has been bundled with NPM but if your are running on **nix Machine you will need to install NPM separately.
Follow this link for instruction on how to install NPM.
Installing Cordova
Ionic can be used with Phonegap or Cordova but for this tutorial we will be building Ionic 3 Mobile App with Apache Cordova.Install Cordova, Open your terminal and input this command.
npm install -g cordova
The command below uses NPM to install Cordova to your Machine.
Getting Started with Building Ionic 3 App
Firstly let's install Ionic and all it dependencies using NPM, Open your terminal and run the code below.
npm install -g ionic
The command above will install ionic-cli, IOnic, Ionic-Agular, Ionic-Material and other necessary module your machine needs to create Ionic Mobile app.For this tutorial, We are going to build a TODO APP with Ionic 3.
Building a TODO Mobile APP with Ionic 3
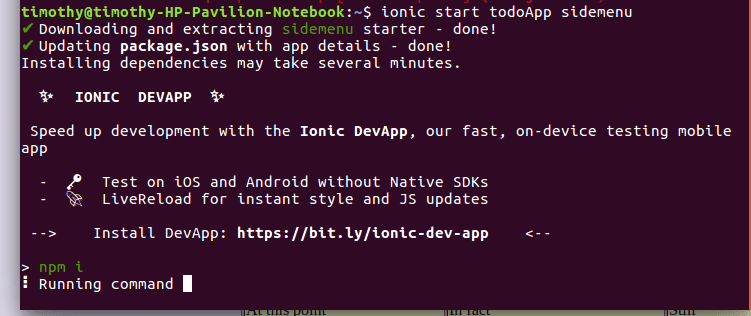
Firstly, Open your terminal and run he following code.
ionic start todoApp sidemenu
The command above will create a folder todoApp and install and ionic sidemenu starter project into the folder.This process will take some minutes before it completes.
cd todoApp
or Open the project folder in any editor of your choice, Microsoft Visual Code is Recommended it's a free, perfect and lite code editor.
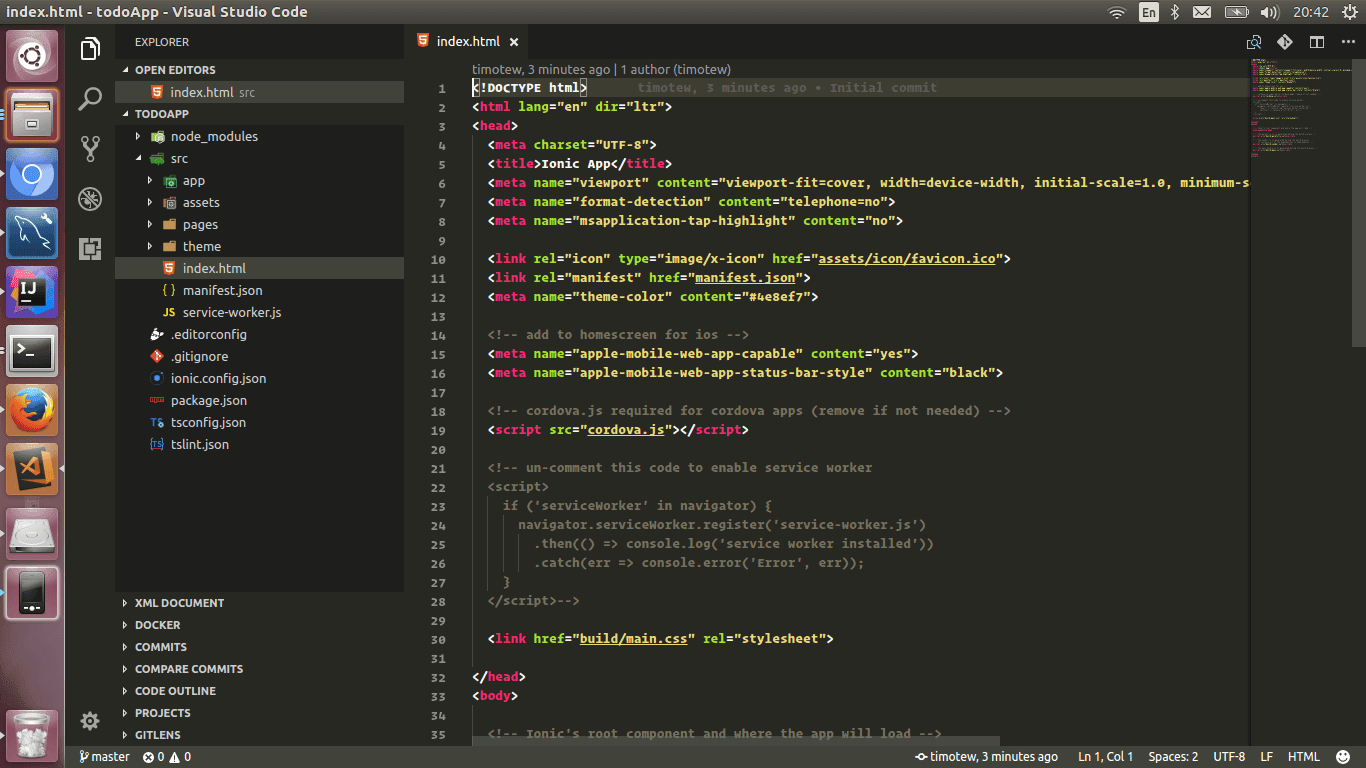
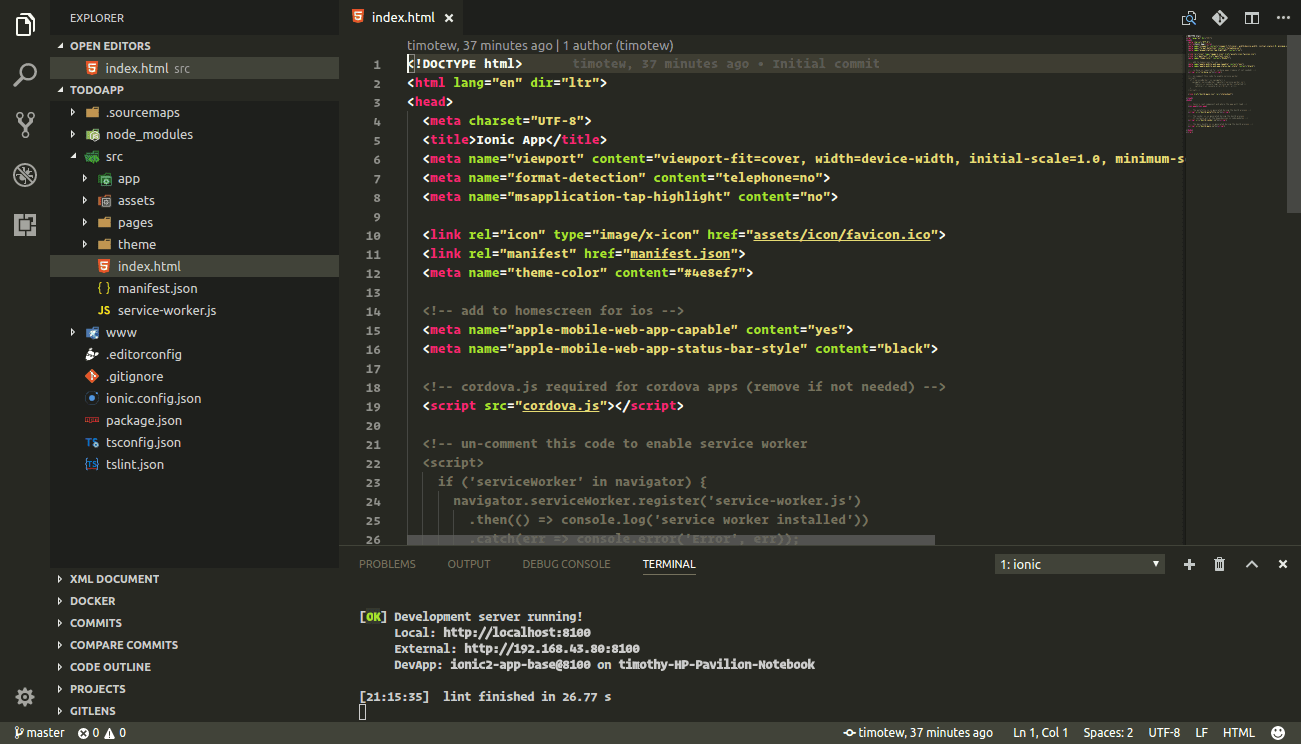
Let's run the todoApp by running the following command in the terminal. To open terminal in Visual Code press Ctrl+`.
ionic serve -l
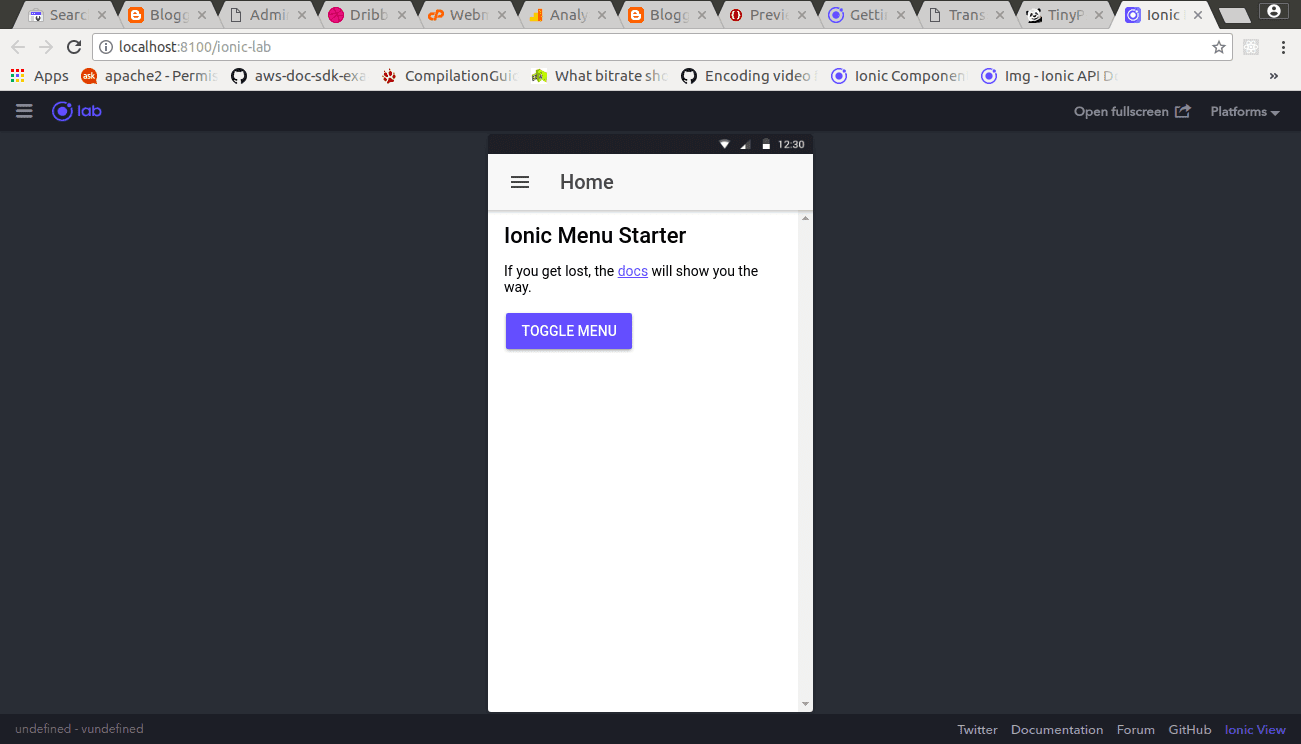
See the expected output below
If we open http://localhost:8100/ionic-lab it should look like below.
/node_modules

/src

  /app

  /assets

  /pages

  /theme

  /index.html

  /manifest.json

  /service-worker.js
| Folder | Description |
|---|---|
| node_modules | In node_modules, all modules used by our ionic app is saved in this folder. This folder is managed by NPM so hands off. |
| src | The src directory contain our raw, uncompiled code.Most of the work for an Ionic app take place in src. When we run ionic serve, our code inside of src/ is transpiled into the correct Javascript version that the browser understands (currently, ES5). That means we can work at a higher level using TypeScript, but compile down to the older form of Javascript the browser needs.
src/app/app.module.ts is the entry point for our app. |
| ./src/app/app.html | This is the main template file. In this template,ion-menu is used as a side menu, and then an ion-nav component to act as the main content area. The ion-menu’s [content] property is bound to the local variable nav from our ion-nav, so it knows where it should animate around. |
| ../pages | This folder contains all the pages in our ionic app, we will be creating a TodoPage for our ionic app. |
| ../theme/variables.scss | This contains all .scss predefined variables used by Ionic. i.e font-folder and default color scheme |
ionic g page todo
This command instruct Ionic to create a new page called todo in our current App.
Ionic stores all pages under the pages folder, Check the src/pages/ foldersee our new page called todo.
Ionic create three files for every page it generates and put them in a folder. In our case todo.html, todo.module.ts, todo.ts and todo.scss.
Our page will not be visible yet until we add it to the src/app/app.module.ts file, like below.
import { BrowserModule } from '@angular/platform-browser';
import { ErrorHandler, NgModule } from '@angular/core';
import { IonicApp, IonicErrorHandler, IonicModule } from 'ionic-angular';
import { MyApp } from './app.component';
import { HomePage } from '../pages/home/home';
import { ListPage } from '../pages/list/list';
import { StatusBar } from '@ionic-native/status-bar';
import { SplashScreen } from '@ionic-native/splash-screen';
import { TodoPageModule } from '../pages/todo/todo.module';
@NgModule({
declarations: [
MyApp,
HomePage,
ListPage
],
imports: [
BrowserModule,TodoPageModule,
IonicModule.forRoot(MyApp),
],
bootstrap: [IonicApp],
entryComponents: [
MyApp,
HomePage,
ListPage
],
providers: [
StatusBar,
SplashScreen,
{provide: ErrorHandler, useClass: IonicErrorHandler}
]
})
export class AppModule {}
In the above code for src/app/app.module.ts, We import the TodoPageModule so that our new page TodoPage will be recognized by our Ionic App.
Next, Let's make our page TodoPage the welcome page for our Todo App.
To do that we will need to edit the src/app/app.component.ts file to look like below.
import { ErrorHandler, NgModule } from '@angular/core';
import { IonicApp, IonicErrorHandler, IonicModule } from 'ionic-angular';
import { MyApp } from './app.component';
import { HomePage } from '../pages/home/home';
import { ListPage } from '../pages/list/list';
import { StatusBar } from '@ionic-native/status-bar';
import { SplashScreen } from '@ionic-native/splash-screen';
import { TodoPageModule } from '../pages/todo/todo.module';
@NgModule({
declarations: [
MyApp,
HomePage,
ListPage
],
imports: [
BrowserModule,TodoPageModule,
IonicModule.forRoot(MyApp),
],
bootstrap: [IonicApp],
entryComponents: [
MyApp,
HomePage,
ListPage
],
providers: [
StatusBar,
SplashScreen,
{provide: ErrorHandler, useClass: IonicErrorHandler}
]
})
export class AppModule {}
import { Component, ViewChild } from '@angular/core';
import { Nav, Platform } from 'ionic-angular';
import { StatusBar } from '@ionic-native/status-bar';
import { SplashScreen } from '@ionic-native/splash-screen';
import { HomePage } from '../pages/home/home';
import { ListPage } from '../pages/list/list';
import {TodoPage} from '../pages/todo/todo';
@Component({
templateUrl: 'app.html'
})
export class MyApp {
@ViewChild(Nav) nav: Nav;
rootPage: any = TodoPage;
pages: Array<{title: string, component: any}>;
constructor(public platform: Platform, public statusBar: StatusBar, public splashScreen: SplashScreen) {
this.initializeApp();
// used for an example of ngFor and navigation
this.pages = [
{ title: 'Home', component: HomePage },
{ title: 'List', component: ListPage }
];
}
initializeApp() {
this.platform.ready().then(() => {
// Okay, so the platform is ready and our plugins are available.
// Here you can do any higher level native things you might need.
this.statusBar.styleDefault();
this.splashScreen.hide();
});
}
openPage(page) {
// Reset the content nav to have just this page
// we wouldn't want the back button to show in this scenario
this.nav.setRoot(page.component);
}
}
Secondly, Here is our todo.html below.
import { Nav, Platform } from 'ionic-angular';
import { StatusBar } from '@ionic-native/status-bar';
import { SplashScreen } from '@ionic-native/splash-screen';
import { HomePage } from '../pages/home/home';
import { ListPage } from '../pages/list/list';
import {TodoPage} from '../pages/todo/todo';
@Component({
templateUrl: 'app.html'
})
export class MyApp {
@ViewChild(Nav) nav: Nav;
rootPage: any = TodoPage;
pages: Array<{title: string, component: any}>;
constructor(public platform: Platform, public statusBar: StatusBar, public splashScreen: SplashScreen) {
this.initializeApp();
// used for an example of ngFor and navigation
this.pages = [
{ title: 'Home', component: HomePage },
{ title: 'List', component: ListPage }
];
}
initializeApp() {
this.platform.ready().then(() => {
// Okay, so the platform is ready and our plugins are available.
// Here you can do any higher level native things you might need.
this.statusBar.styleDefault();
this.splashScreen.hide();
});
}
openPage(page) {
// Reset the content nav to have just this page
// we wouldn't want the back button to show in this scenario
this.nav.setRoot(page.component);
}
}
<ion-header>
<ion-navbar>
<ion-title>Todo Page</ion-title>
</ion-navbar>
</ion-header>
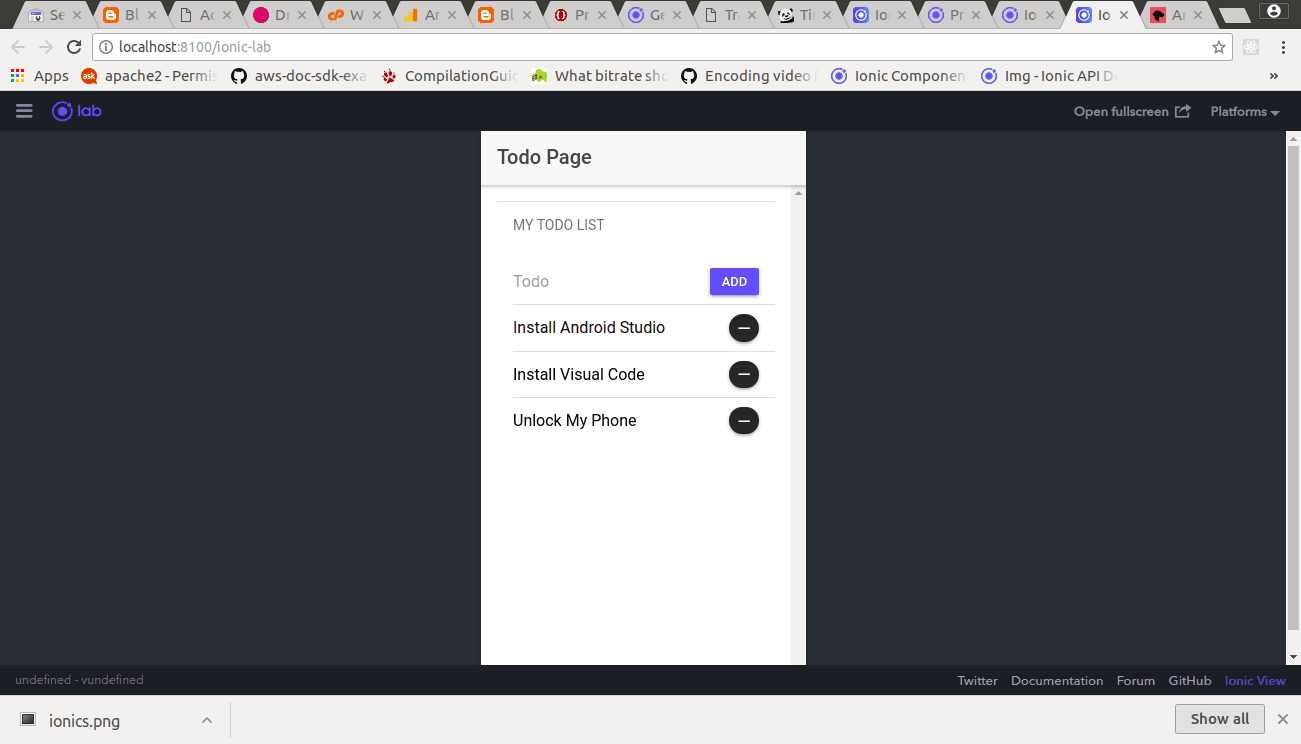
<ion-content padding>
<ion-list-header>
MY TODO LIST
</ion-list-header>
<ion-list>
<ion-item>
<ion-label>Todo</ion-label>
<ion-input [(ngModel)]="todoBox" type="text"></ion-input>
<button item-right secondary outlined ion-button small (click)="addTodo()" >Add</button>
</ion-item>
<ion-item *ngFor="let do of allTodos; let i=index; ">
{{do}}
<button item-right color="dark" icon-only round ion-button small (click)="removeTodo(i)" >
<ion-icon name="remove"></ion-icon>
</button>
</ion-item>
</ion-list>
</ion-content>
import { Component } from '@angular/core';
import { IonicPage, NavController, NavParams, AlertController } from 'ionic-angular';
@IonicPage()
@Component({
selector: 'page-todo',
templateUrl: 'todo.html',
})
export class TodoPage {
public todoBox:string="";
public allTodos:Array<string>=["Install Android Studio","Install Visual Code"];
constructor(public alertCtrl: AlertController, public navCtrl: NavController, public navParams: NavParams) {
}
addTodo(){
let self=this;
/*
*check if the todoBox input is no empty
*/
if(self.todoBox !=="")
self.allTodos.push(self.todoBox); //add the string to all todos array
self.todoBox="";//clean the todoBox
}
removeTodo(index){
let self=this;
let toRemove = self.allTodos[index];
if(toRemove){
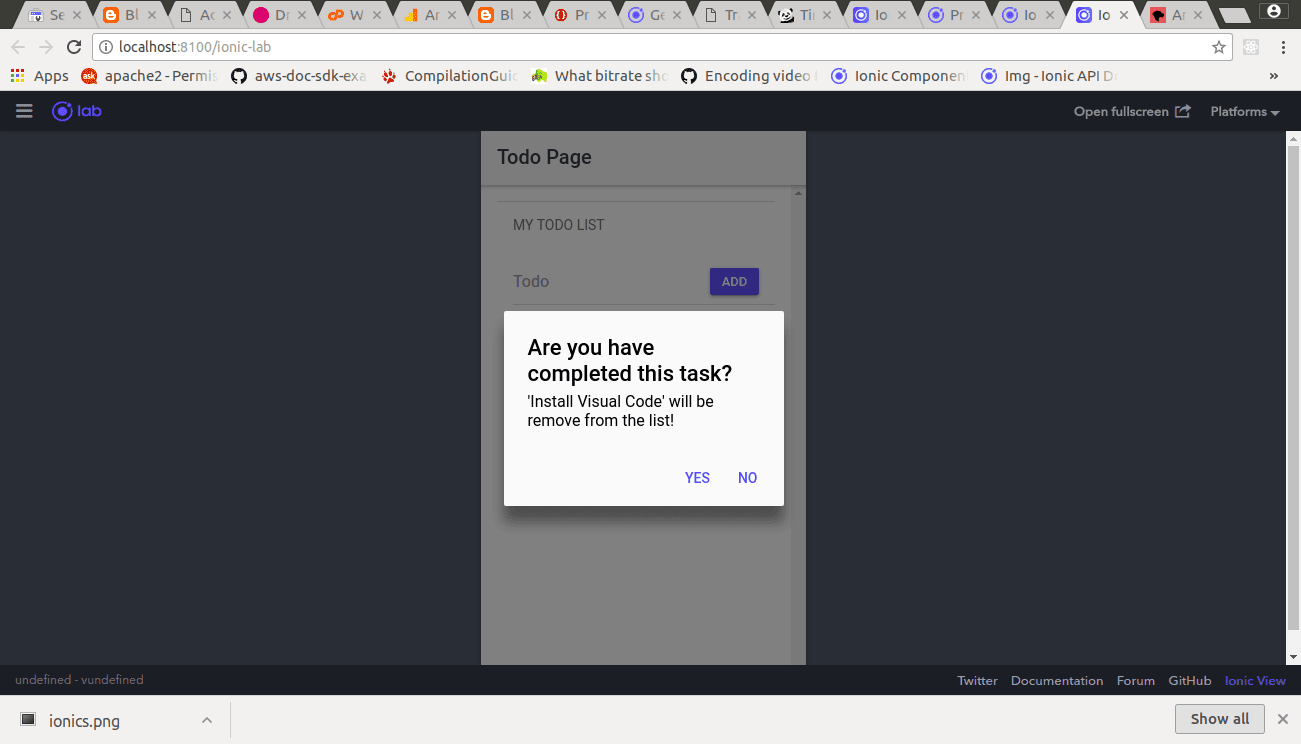
let alert = this.alertCtrl.create({
title: 'Are you have completed this task?',
subTitle: "'"+toRemove+"' will be remove from the list!",
buttons: [{
text: 'Yes',
handler: () => {
self.allTodos.splice(index,1);
}
},'No']
});
alert.present();
}
}
ionViewDidLoad() {
console.log('ionViewDidLoad TodoPage');
}
}
import { IonicPage, NavController, NavParams, AlertController } from 'ionic-angular';
@IonicPage()
@Component({
selector: 'page-todo',
templateUrl: 'todo.html',
})
export class TodoPage {
public todoBox:string="";
public allTodos:Array<string>=["Install Android Studio","Install Visual Code"];
constructor(public alertCtrl: AlertController, public navCtrl: NavController, public navParams: NavParams) {
}
addTodo(){
let self=this;
/*
*check if the todoBox input is no empty
*/
if(self.todoBox !=="")
self.allTodos.push(self.todoBox); //add the string to all todos array
self.todoBox="";//clean the todoBox
}
removeTodo(index){
let self=this;
let toRemove = self.allTodos[index];
if(toRemove){
let alert = this.alertCtrl.create({
title: 'Are you have completed this task?',
subTitle: "'"+toRemove+"' will be remove from the list!",
buttons: [{
text: 'Yes',
handler: () => {
self.allTodos.splice(index,1);
}
},'No']
});
alert.present();
}
}
ionViewDidLoad() {
console.log('ionViewDidLoad TodoPage');
}
}
ionic cordova build android --prod
Secondly, To compile for iOS devices run this command.
ionic cordova build ios --prod
You can download the demo(TodoApp) source code below
Download Script
Please check the readme.txt file for instructions
Thanks!
Your feedback helps us improve tutorials.
No comments:
Post a Comment